
Get started
Set up your first project
Create a project for your API and get it ready to scan. About ten minutes, most of it waiting for DNS.
A project is one API. If you run staging and production separately, create a project for each so their findings stay apart.
Before you start#
- An API that's reachable on the internet. A staging deployment is ideal.
- Access to the DNS settings for the API's domain.
- A test user on your API, if you want authorization checks. Optional, but recommended.
1. Create the project#
- In the app, open Projects and choose New project.
- Give it a name, for example
payments-staging. - Pick the environment. Production projects never receive requests that change data.
- Enter your API base URL, for example
https://api.example.com.
2. Verify your domain#
AuditGate only scans domains you've proved you control. You prove it with a DNS record.
- Open Project settings → Domain verification.
- At your DNS provider, add a
TXTrecord with the name and value shown. Most providers (Cloudflare, Namecheap, GoDaddy) add your domain to the name for you, so enter just the short name, such as_auditgate.api. - Wait a minute or two, then choose Verify.
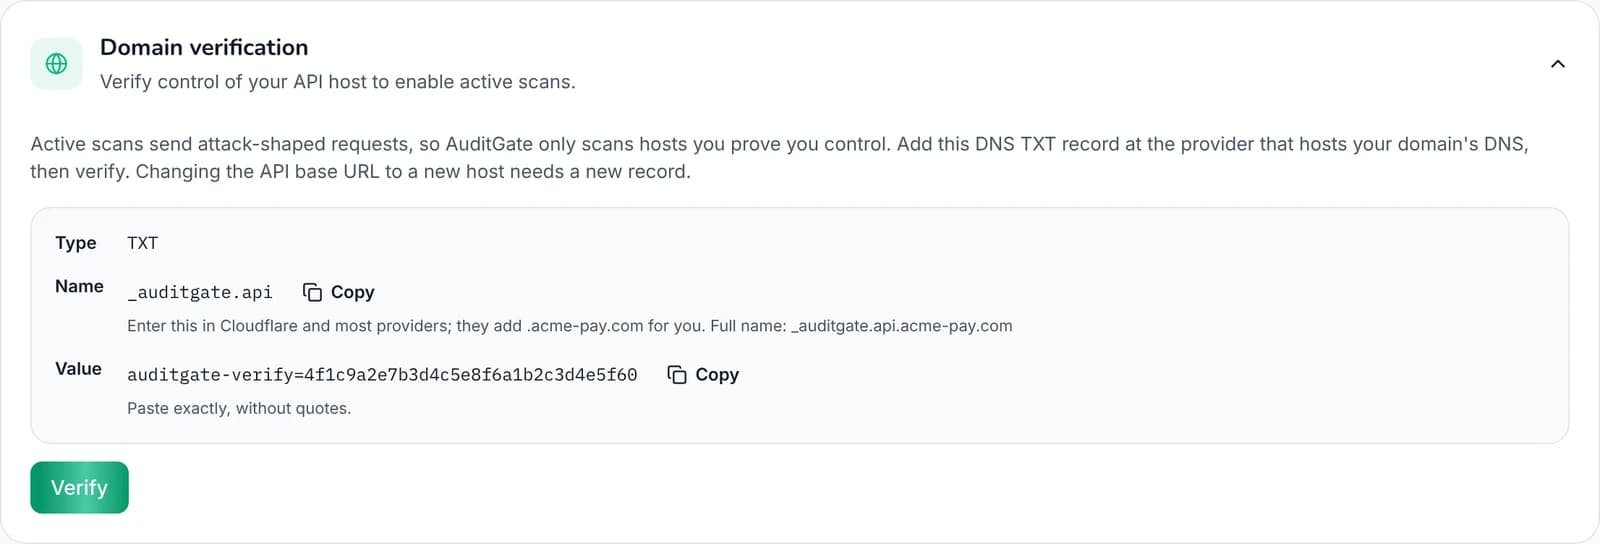 123
1Short name to enter at your DNS provider
2Value to paste, exactly as shown
3Choose Verify once the record is added
If it doesn't verify, the card tells you why: record missing, wrong value, or the domain added to the name twice.
3. Add a test user (recommended)#
Under Project settings → Scan test tokens, paste a token for a test account. With it, scans can check whether a logged-in user can reach things they shouldn't. Add a second user to test whether one user can read another's data, and a low-privilege user to test admin-only routes.
That's it. Run your first scan.